How to Update GoDaddy Nameservers ?
 If you're looking to change your domain nameservers at GoDaddy, you've come to the right place. In this guide, we'll walk you through the steps you need to take to successfully update your nameservers and get your website up and running.
Introduction
Before we get started, let's define what domain nameservers are and why they are important. Domain nameservers are essentially the phone book of the internet. They translate domain names (like example.com) into IP addresses (like 192.168.0.1) that computers can understand.
When you register a domain name, it comes with default nameservers that point to the registrar's DNS servers. However, you may want to use different nameservers, for example, if you're using a third-party DNS provider or hosting provider.
In this guide, we'll cover how to change your nameservers using the GoDaddy dashboard.
- Sign in to your GoDaddy Domain Control Center Account
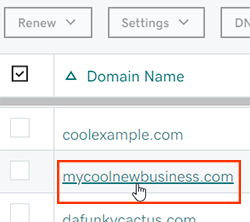
- Select your domain to access the Domain Settings page.

- Select Manage DNS to access your zone file.
- Select Change in the Nameservers section.

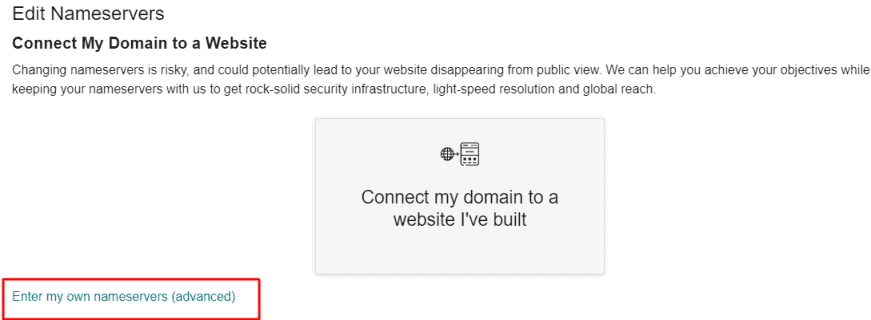
- Choose the option that works best for you
- Connect my domain to a website I've built: Use our wizard to connect your domain to a website built elsewhere, such as Squarespace, Weebly or WordPress.
- I want to use GoDaddy default nameservers: This Settings will automatically update your domain to a set of GoDaddy nameservers. This option is only available if you're not currently using GoDaddy nameservers.
- Enter my own nameservers (advanced): Enter the nameservers given to you by your hosting provider.

- Select Save or Connect.
- Check the box next to Yes, I consent to update Nameservers for the selected domain(s).
After you've saved your new nameservers, it may take some time for them to propagate across the internet. This process can take anywhere from a few minutes to a few hours, depending on various factors.
During this time, your website may be inaccessible or appear to be down. This is normal and nothing to worry about.